


)
)
Introduction
How can an IT professional remote into a MacBook from Windows without weakening security or making support harder than it needs to be? This question comes up often in mixed Windows and macOS environments, where help desks may run mainly on Windows while executives, designers, developers or remote employees use MacBooks every day.
The answer depends on the support context. Some tasks require full screen control, while others only need command-line access, unattended support or a secure workflow for assisting end users across locations.
TSplus Remote Support Free Trial
Cost-effective Attended and Unattended Remote Assistance from/to macOS and Windows PCs.
Can You Remote Into a MacBook from Windows?
Yes, you can remote into a MacBook from a Windows PC, but the right method depends on the type of access required.
For full graphical control, IT teams usually choose macOS Screen Sharing with Virtual Network Computing, Chrome Remote Desktop or a remote support tool. For administration tasks that do not require the desktop interface, Secure Shell is often faster and cleaner. For private corporate networks, a VPN or zero-trust access layer may be required before the session can start.
The main point is protocol compatibility. Remote Desktop Protocol, or RDP, is designed for Windows desktops, Windows Server environments, Remote Desktop Services, Azure Virtual Desktop, Windows 365 and similar Microsoft resources. macOS does not include a native RDP host for remote control of the Mac desktop.
For macOS, graphical remote access is usually based on Screen Sharing, VNC-compatible access or a dedicated support agent.
Method 1: Use macOS Screen Sharing and a VNC Client
The most direct native approach is to enable Screen Sharing or Remote Management on the MacBook, then connect from Windows with an approved VNC client.
Virtual Network Computing, or VNC, allows a remote viewer to see and control another computer’s graphical desktop. macOS includes Screen Sharing capabilities that can accept compatible VNC connections when configured correctly.
When VNC Makes Sense
VNC is useful when the Windows PC and MacBook are on the same trusted network, when the MacBook is reachable by hostname or IP address, and when the administrator needs full graphical access.
This method is common in internal IT networks, test labs, training environments and VPN-protected administration scenarios. VNC is not a good candidate for direct public Internet exposure because it can create unnecessary attack surface.
How to Enable Screen Sharing on the MacBook
On the MacBook:
- Open System Settings.
- Go to General.
- Open Sharing.
- Enable Screen Sharing.
- Choose which users are allowed to connect.
- Note the MacBook hostname or IP address.
- If needed, open the Screen Sharing settings and allow VNC viewers to connect with a password.
Some managed environments use Remote Management instead of basic Screen Sharing. Remote Management is associated with Apple Remote Desktop and broader administration workflows, so IT teams should align the setting with internal policy before enabling it across a fleet.
How to Connect from Windows
On the Windows PC:
- Install an approved VNC viewer.
- Open the VNC client.
- Enter the MacBook hostname or IP address.
- Authenticate with the permitted macOS account or configured VNC password.
- Start the session and confirm that screen viewing and control work.
VNC commonly uses TCP port 5900. If the connection fails, check DNS, routing, firewalls, macOS sharing settings, endpoint security tools and whether the MacBook is awake.
Security Notes for VNC
VNC should be treated as privileged remote access. Do not publish VNC directly to the Internet.
For business use, protect VNC with a VPN, firewall rules, strong authentication, least-privilege macOS accounts and monitoring where possible. Avoid reusing the same password for VNC access and local administrator accounts. Apple also warns administrators not to use a VNC password that matches a local user or Remote Desktop administrator password.
Method 2: Use Chrome Remote Desktop
Chrome Remote Desktop is often the easiest way for individuals or small teams to access a MacBook from Windows. It uses a Google account, a browser-based interface and a host component installed on the remote computer.
This method is useful when the priority is quick cross-platform access rather than a structured support process.
When Chrome Remote Desktop Fits
Chrome Remote Desktop can be a good fit when a user needs simple access, when the number of devices is small and when advanced support features are not required.
It works across Windows, macOS and Linux computers. It can also support one-time assistance through access codes, which makes it convenient for lightweight support scenarios.
How to Set It Up on the MacBook
On the MacBook:
- Open Chrome.
- Go to Chrome Remote Desktop.
- Choose Remote Access.
- Install the Chrome Remote Desktop host when prompted.
- Grant the required macOS permissions.
- Name the computer.
- Create a secure PIN.
- Confirm that the MacBook appears online.
On the Windows PC:
- Open Chrome.
- Sign in with the authorized Google account.
- Open Chrome Remote Desktop.
- Select the MacBook.
- Enter the PIN.
- Start the remote session.
Limitations for IT Teams
Chrome Remote Desktop is convenient, but it is not always enough for help desks, MSPs or regulated organizations.
Centralized technician permissions, support queues, session auditing, branding, reporting and unattended access governance are limited compared with dedicated remote support software. For personal access, Chrome Remote Desktop can work well. For professional support, IT teams usually need more control.
Method 3: Use Secure Shell for Command-Line Access
Not every support task requires screen sharing. For administrators, Secure Shell, or SSH, is often the cleanest way to manage a MacBook remotely.
SSH allows encrypted command-line access to macOS. Administrators can run scripts, collect logs, restart services, edit configuration files, transfer files and perform maintenance without loading the full graphical desktop.
When SSH Is the Right Choice
Use SSH when the task is administrative rather than visual. Common examples include checking services, updating configuration files, running scripts, using SFTP or SCP, and troubleshooting network behavior.
SSH is not the right choice when the user needs help inside a graphical application or when the technician must see exactly what the user sees.
How to Enable SSH on macOS
On the MacBook:
- Open System Settings.
- Go to General.
- Open Sharing.
- Enable Remote Login.
- Choose which users can log in remotely.
- Note the SSH command or hostname shown by macOS.
On Windows, connect with Windows Terminal, PowerShell, OpenSSH, PuTTY or another approved SSH client.
Example:
For business environments, use SSH keys where possible, restrict login rights and avoid broad password-based access.
Method 4: Use a VPN Before VNC or SSH
If the MacBook is inside a corporate network, an external Windows device may not be able to reach it directly. In that case, the user or administrator should first connect through a VPN or zero-trust network access solution.
After the secure tunnel is established, the Windows PC can reach the MacBook by internal hostname or private IP address. The actual remote session may still use VNC, SSH or another management tool.
Why VPN Protection Matters
A VPN reduces the need to expose remote access services to the public Internet. It also gives IT teams a place to enforce identity checks, multi-factor authentication, device posture requirements, logging and segmentation.
A secure workflow usually looks like this:
- The administrator connects to the corporate VPN.
- Identity and multi-factor authentication are checked.
- The administrator reaches the internal MacBook address.
- The administrator starts the VNC or SSH session.
- VPN and endpoint logs provide an audit trail.
This model is more controlled than opening VNC or SSH directly through a firewall.
Method 5: Use Professional Remote Support Software
For IT departments, MSPs and support teams, professional remote support software is usually the most practical way to remote control a MacBook from Windows. It avoids the complexity of exposing VNC, relying on ad hoc user setup or maintaining different connection methods for every support case.
Remote support software is designed around real support workflows. It can provide attended access, unattended access, technician permissions, session control, file transfer, chat, multi-monitor visibility and endpoint organization.
This gives technicians a more consistent way to support users, whether the endpoint is a MacBook, a Windows PC or another managed device.
When Remote Support Software Is the Best Option
Remote support software is the right choice when support teams manage multiple endpoints, assist non-technical users or need to support devices outside the corporate LAN. It is especially useful when users work from home, travel frequently or connect from networks that IT does not directly control.
It is also a better fit when IT teams need accountability. Technician access, user consent, session history and permission management matter when remote control becomes a daily support function rather than an occasional admin task.
Over time, these controls help support teams improve response times while keeping remote access aligned with internal security policies.
What Are The Best Ways to Remote Into a MacBook from Windows?
Each remote access method has a different operational fit. The table below gives IT teams a quick comparison before going into setup details.
| Method | Best For | Main Limitation |
|---|---|---|
| macOS Screen Sharing with VNC | Internal admin access, labs and trusted networks | Requires network reachability and careful security controls |
| Chrome Remote Desktop | Simple cross-platform access for individuals or small teams | Limited technician workflow and governance features |
| Secure Shell | Command-line administration, scripting and file transfer | No graphical desktop control |
| VPN plus VNC or SSH | Access to Macs on private corporate networks | Requires VPN infrastructure and endpoint policy management |
| Remote support software | Help desks, MSPs, unattended access and user assistance | Requires software deployment on endpoints |
For one MacBook, a lightweight method may be enough. For recurring business support, the better question is not only “Can I connect?” but also “Can I control access, prove who connected and support users consistently?”
What Type of macOS Permissions Do You Need for Remote Access?
Modern macOS versions enforce strict privacy controls. A remote access tool may connect successfully but still fail to show the screen or control the keyboard and mouse until the right permissions are granted.
Common permissions include Screen Recording or Screen and System Audio Recording, Accessibility, Full Disk Access, Files and Folders, Input Monitoring and Remote Desktop permissions, depending on the tool and macOS version.
For managed Mac fleets, mobile device management can help standardize some privacy and security settings. For unmanaged devices, the end user may need to approve permissions manually in System Settings.
When a remote session opens but the technician cannot see or control the desktop, macOS privacy permissions should be one of the first checks.
How Can You Troubleshoot Remote Access from Windows to Mac?
Connection problems are usually caused by reachability, permissions, power state or protocol mismatch. Start with the basics before changing tools.
The MacBook Is Asleep or Offline
A remote session requires the MacBook to be powered on, connected and reachable. Laptops may sleep when the lid is closed, when running on battery or when network wake behavior is not configured.
Check power settings, Wi-Fi or Ethernet connectivity, and whether the device is available on the expected network.
The Wrong Protocol Is Being Used
Do not use standard Windows RDP to connect directly into macOS. RDP is appropriate when the target is a Windows system. For a MacBook, use VNC, SSH, Chrome Remote Desktop or remote support software.
This distinction prevents wasted troubleshooting time and helps technicians choose the correct tool from the start.
Firewall Rules Are Blocking the Session
For VNC, check whether TCP port 5900 is allowed between the Windows PC and the MacBook. For SSH, check TCP port 22.
If the MacBook sits behind NAT or on another network, use VPN access, routing changes or a remote support relay service rather than exposing ports directly.
macOS Permissions Are Missing
If the session connects but the screen is black or input does not work, check Screen Recording, Accessibility and related permissions.
This issue is common after installing a new remote support tool or upgrading macOS.
User Permissions Are Incorrect
Confirm that the right macOS users are allowed to connect. Avoid granting broad remote access to every local user unless policy requires it.
For business support, use named accounts, managed groups or tool-based technician permissions.
FileVault or Reboot State Blocks Access
If FileVault is enabled, a MacBook may require local unlock after reboot before some remote access methods become available.
Plan unattended support and maintenance windows with encryption, reboot behavior and user availability in mind.
What Are the Security Best Practices for Mac Remote Access?
Remote access should be managed with the same discipline on macOS as on Windows endpoints. A MacBook can contain executive data, source code, design assets, financial files or sensitive customer information.
Avoid Direct Internet Exposure
Do not expose VNC directly to the public Internet. Use a VPN, zero-trust access solution or secure remote support broker to reduce the attack surface before any remote session begins.
Enforce Strong Authentication
Require multi-factor authentication wherever possible. For Secure Shell access, prefer SSH keys over passwords and restrict remote login to approved users only.
Apply Least-Privilege Access
Give technicians and users only the access they need. Separate day-to-day user accounts from administrator accounts and avoid granting broad remote access to every local user.
Keep Access Temporary and Reviewed
Remote access should not remain open indefinitely. Rotate credentials regularly, remove access when it is no longer needed and review who can connect to each MacBook.
Manage Configuration at Scale
Keep macOS, remote access tools and security agents updated. For managed fleets, use mobile device management to enforce sharing settings, privacy permissions and endpoint configuration.
Maintain Visibility and Accountability
Record who can access each MacBook and why. Where possible, use session history, technician permissions and access logs to support auditing and incident response.
Security should not make support impossible. The goal is to give technicians reliable access while keeping identity, permissions and session activity under control.
Which Method Should You Choose?
The best method depends on the job, the network context and the level of control your organization needs. A quick personal connection does not require the same setup as recurring help desk support across a mixed Windows and macOS fleet.
Choose SSH for Command-Line Administration
Use Secure Shell when the task does not require the macOS desktop. SSH is efficient for running scripts, collecting logs, editing configuration files, transferring files and troubleshooting services.
This is the cleanest option for administrators who know what they need to check or change. It is not suitable when the technician must see the user’s screen or guide the user through a graphical application.
Choose VNC Over VPN for Internal Graphical Access
Use VNC over a VPN when the MacBook is inside a trusted network and graphical desktop control is required. This approach works well for managed LANs, lab environments and internal administration scenarios.
The VPN layer is important because it avoids exposing VNC directly to the Internet. IT teams should still apply strong authentication, firewall restrictions and clear user permissions.
Choose Chrome Remote Desktop for Simple Access
Use Chrome Remote Desktop when the priority is a fast, simple connection for personal use or a small number of devices. It is easy to set up and works across major operating systems.
However, Chrome Remote Desktop is less suitable when IT teams need advanced technician permissions, centralized governance, session tracking or structured support workflows.
Choose Remote Support Software for IT Teams
Use professional remote support software when support is a recurring business function. This is usually the best fit for help desks, MSPs and organizations that support users across locations, devices and networks.
A managed remote support platform avoids direct port exposure, supports cross-platform assistance and gives technicians a consistent way to help users. For IT teams, this is usually the most scalable choice because it combines usability, security and operational control.
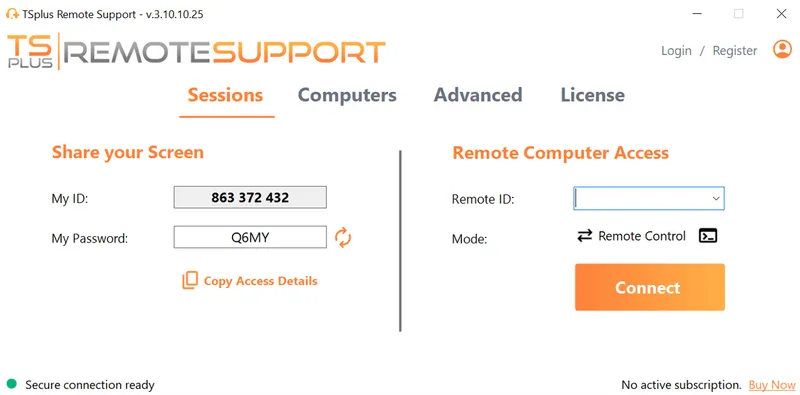
How Does TSplus Remote Support Helps?
TSplus Remote Support enables IT teams to provide attended and unattended assistance across Windows and macOS environments. Support agents can connect to remote devices, assist users, troubleshoot issues and reduce the need for complex VPN or firewall changes.
For mixed-device businesses, this approach simplifies the support workflow. Instead of maintaining separate methods for each operating system, technicians can use one consistent process for remote assistance.
Conclusion
To remote into a MacBook from Windows, match the tool to the task: SSH for administration, VNC for controlled internal access, Chrome Remote Desktop for simplicity, and TSplus Remote Support for secure, scalable Mac and Windows assistance across business environments worldwide.
TSplus Remote Support Free Trial
Cost-effective Attended and Unattended Remote Assistance from/to macOS and Windows PCs.
)
)
)