


)
)
TSplus Remote Support Free Trial
Cost-effective Attended and Unattended Remote Assistance from/to macOS and Windows PCs.
Enabling Remote Assistance in Windows 10
Before initiating Remote Assistance, it is essential to enable this feature on the Windows 10 system.
Accessing System Properties
System Properties is the primary location to configure Remote Assistance settings.
Navigating to System Properties: Right-click on 'This PC' on your desktop or in File Explorer, and select 'Properties'. Then click on 'Remote settings' on the left panel to open the System Properties dialog box. This access point allows IT administrators to adjust critical settings that influence both system performance and security measures essential for remote operations.
Enabling Remote Assistance: In the 'Remote' tab, check the box labeled 'Allow Remote Assistance connections to this computer'. Ensure that the necessary firewall exceptions are also enabled to allow incoming connections. This step is crucial as it not only enables the feature but also ensures that the system's security posture is maintained during remote sessions, protecting both the host and client systems from unauthorized access .
Using the Registry
Introduction: For advanced users, Remote Assistance can also be enabled via the Windows Registry, providing a more granular control over the settings.
Opening the Registry Editor: Press
Win + R
Remote Desktop Services (RDS) is a technology that allows users to access their desktops remotely.
regedit
, and hit Enter to open the Registry Editor. This tool allows direct manipulation of system configurations, offering a deeper level of customization for experienced users.
Modifying the Registry: Navigate to
HKEY_LOCAL_MACHINE\SYSTEM\CurrentControlSet\Control\Remote Assistance
. Double-click on
fAllowToGetHelp
and change its value to
1
to enable Remote Assistance. This modification is essential for environments where group policy changes are managed centrally, allowing IT professionals to deploy settings across multiple computers efficiently.
Enabling Remote Assistance through System Properties or the Registry Editor provides the foundational access needed for IT support teams to perform remote troubleshooting effectively. This setup ensures that support can be provided swiftly and securely, reflecting the needs of a dynamic workplace.
Initiating a Remote Assistance Session
Setting up a Remote Assistance session involves sending an invitation and establishing a connection.
Sending an Invitation
Initiating Remote Assistance requires sending a formal invitation to the support personnel or IT professional who will assist.
Using Windows Tools: To start, navigate to the start menu and type 'Remote Assistance' to find the option 'Invite someone to connect to your PC and help you, or offer to help someone else.' This feature is part of Windows' built-in support tools, enabling users to request help efficiently.
Sending the Invitation: Depending on the user’s preference or organisational protocols, the invitation can be sent as a file or via email. The process involves creating the invitation, which generates a file or message containing a unique connection code. Follow the on-screen prompts to specify how the invitation should be sent and ensure all necessary information is included for the helper to connect.
Connecting to a Remote Session
The recipient of the invitation will use the provided details to establish a connection to the requester's system.
Using the Invitation File or Code: The helper opens the received invitation file or enters the provided code from the email. This code is essential for authenticating and securing the connection between the two systems.
Starting the Remote Session: Upon entering the password, the remote session will activate, allowing the helper full or partial access to the user's computer, depending on the permissions set. This access enables the helper to view the user's screen, control the mouse and keyboard, and perform necessary troubleshooting tasks directly.
Streamlining the Process: For regular support activities, IT departments can streamline the process by using templates for invitation messages or automating parts of the setup through scripting, reducing the time to connect and increasing efficiency during critical support incidents.
Advanced Settings and Tips
Enhancing the efficiency and security of a Remote Assistance session is crucial for IT professionals.
Security Considerations
Maintaining high security standards During remote sessions, it is vital to protect both the data and the integrity of the systems involved.
Encryption: Employing end-to-end encryption ensures that all data transmitted during a remote session is protected from unauthorized access. This includes screen data, file transfers, and keystroke information, safeguarding sensitive information against potential breaches.
Password Security: Implement strong, randomly generated passwords for each session. Consider using a password manager to generate and retrieve complex passwords, enhancing security without sacrificing convenience.
Additional Measures: Enable two-factor authentication (2FA) for an added layer of security. This requires users to provide two forms of identification before access is granted, greatly reducing the risk of unauthorized entry.
Performance Optimization
Optimising the performance of Remote Assistance is essential to ensure a smooth and responsive experience, particularly over varied network conditions.
Visual Settings: Reducing the colour quality and disabling unnecessary graphical effects like background images can significantly enhance performance, especially when bandwidth is limited. These settings can be adjusted from within the Remote Assistance options, allowing for a balance between visual quality and performance efficiency.
Bandwidth Management: Prioritise critical data traffic by adjusting the Quality of Service (QoS) settings on your network. This ensures that Remote Assistance data packets are prioritised on the network, which is crucial in maintaining connection stability and responsiveness during remote sessions.
Connection Quality: Regularly monitor the connection quality during remote sessions. If lag or jitter is observed, consider reducing the screen resolution or pausing any non-essential applications that may be consuming bandwidth.
Session Efficiency Tips: Close unnecessary applications on both the host and client machines to free up resources. Also, consider using wired connections instead of wireless to reduce latency and increase connection reliability during critical support tasks.
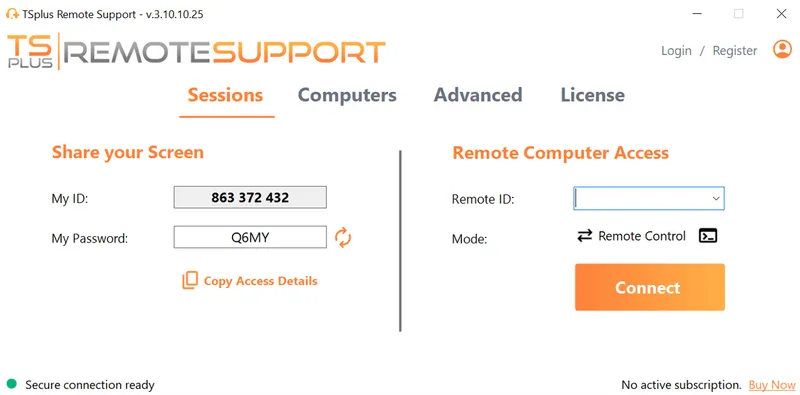
Why TSplus Remote Support is the solution
For IT professionals managing remote support, TSplus Remote Support stands out as the premier solution. It simplifies the remote connection process by eliminating the need for complicated invitation systems, offering direct connections through secure IDs. Enhanced security features, including robust encryption and customizable user permissions, ensure that sensitive information remains protected. TSplus Remote Support's user-friendly administration tools also allow seamless management of user roles and permissions, making it ideal for both small and large IT environments.
Conclusion
In conclusion, leveraging Windows 10 Remote Assistance can significantly improve the efficiency and effectiveness of IT support. For professionals seeking more robust solutions, TSplus Remote Support offers superior security, usability, and management features, positioning it as a top choice for those looking to enhance their remote assistance capabilities.
TSplus Remote Support Free Trial
Cost-effective Attended and Unattended Remote Assistance from/to macOS and Windows PCs.
)
)
)