


)
)
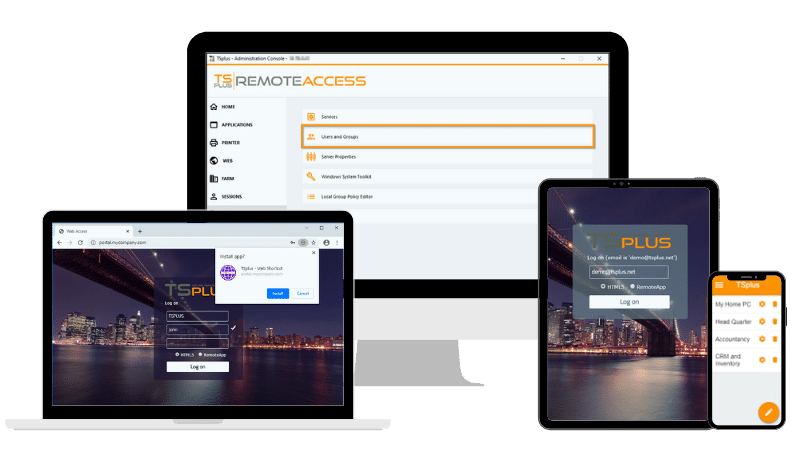
TSplus Remote Access Free Trial
Ultimate Citrix/RDS alternative for desktop/app access. Secure, cost-effective, on-premises/cloud
Prerequisites
Before you begin, ensure the following:
- You are using Windows 10 or 11 Pro or Enterprise editions. RDP is not supported on Windows Home editions.
- The remote PC is powered on and connected to the internet.
- You have administrative access to the remote PC.
Setting Up Remote Desktop on Windows 10 and 11
Setting up Remote Desktop on Windows is a crucial step for IT professionals needing to manage systems remotely. This section details how to enable Remote Desktop using two primary methods: through Windows Settings and the Control Panel.
Using Windows Settings
Enabling Remote Desktop
-
Open Settings: Press the Windows key and click on the gear icon to open Settings. Alternatively, press
Win + Ito directly open the Settings app. -
Navigate to Remote Desktop: Go to
System > Remote DesktopThis can also be accessed by typing "Remote Desktop" in the search bar within the Settings app. - Enable Remote Desktop: Toggle the switch to enable Remote Desktop. A confirmation window will appear; click "Confirm" to enable the setting.
Note: This action allows remote connections to the computer, making it accessible over the network.
Additional Configuration
- Keep PC Awake: Ensure the options to keep your PC awake for connections and make it discoverable on private networks are enabled. This ensures that your PC remains accessible even when it is not actively being used.
- Advanced Settings: Click on "Advanced settings" to enable Network Level Authentication (NLA). NLA requires users to be authenticated before a remote session is established, enhancing security by preventing unauthorised access.
Using Control Panel
For those who prefer a more traditional approach, enabling Remote Desktop via the Control Panel is an alternative method.
Step-by-Step Guide
-
Open Control Panel: Type "Control Panel" in the search bar and open it. Alternatively, press
Win + Rcontrol -
System and Security: Navigate to
System and Security > SystemClick on “Allow remote access” to access Remote Desktop settings. - Allow Remote Access In the Remote tab, check "Allow remote connections to this computer". Ensure "Network Level Authentication" is enabled for added security. Click “Apply” and then “OK” to save changes.
Wrapping Up Remote Desktop Setup
Enabling Remote Desktop using either method will allow you to remotely connect to your PC. The next crucial step involves configuring your firewall settings to permit these connections.
Configuring Firewall Settings
Proper firewall configuration is essential for enabling Remote Desktop connections. This section provides detailed steps to allow RDP through Windows Firewall.
Step-by-Step Guide
-
Open Firewall Settings: Type "firewall" in the Windows search bar and select "Allow an app through Windows Firewall". Alternatively, navigate to
Control Panel > System and Security > Windows Defender Firewall > Allow an app or feature through Windows Defender Firewall. - Change Settings: Click on "Change settings" to enable modifications. This action allows you to grant or restrict permissions for different applications.
- Enable Remote Desktop: Ensure both Private and Public checkboxes for Remote Desktop are checked. This enables Remote Desktop traffic through the firewall for both private and public networks. Click “OK” to save changes and apply the new firewall rules.
Verifying Firewall Configuration
After configuring the firewall, it's crucial to verify the settings:
- Ensure the Remote Desktop app is listed and both checkboxes are enabled.
- Test the connection from another device to confirm that the firewall settings are correctly applied.
With the firewall configured, the next step involves securing your Remote Desktop connection to prevent unauthorized access and ensure data integrity.
Advanced Security Settings
To protect your remote connections, it's essential to implement advanced security measures This section outlines best practices for securing Remote Desktop connections.
Enabling Network Level Authentication (NLA)
-
Open Remote Desktop Settings: Navigate to
Settings > System > Remote DesktopClick on "Advanced settings". - Enable NLA: Check the box next to "Require computers to use Network Level Authentication (NLA) to connect". NLA requires user authentication before establishing a remote session, adding an extra layer of security.
Using Strong Passwords
- Create Strong Passwords: Ensure all accounts with remote access privileges use strong, unique passwords. A strong password should include a mix of upper- and lower-case letters, numbers, and special characters.
- Regularly Update Passwords: Implement a policy to regularly update passwords and avoid using the same password for multiple accounts.
Keeping Software Updated
-
Update Windows: Regularly check for and install Windows updates to ensure your system is protected against the latest security vulnerabilities. Go to
Settings > Update & Security > Windows Updateand click "Check for updates". - Update RDP Software: Ensure that the Remote Desktop software and any related applications are up-to-date. Regular updates help protect against known vulnerabilities and enhance security.
Using Two-Factor Authentication (2FA)
- Implement 2FA: Use two-factor authentication to add an additional layer of security. 2FA requires users to verify their identity using a second factor, such as a mobile app or SMS code, in addition to their password.
By implementing these advanced security measures By using Remote Desktop Connection (RDC) across different devices, you can significantly enhance the security of your remote connections. The next section explores how to use Remote Desktop Connection (RDC) across different devices, broadening your access capabilities.
Using Remote Desktop Connection (RDC) on Different Devices
RDC is a versatile tool available across multiple platforms, allowing access to Windows PCs from various devices. This section details how to use RDC on Windows, Mac, iOS, and Android devices.
Using RDC on Windows Devices
- Built-in Remote Desktop Connection App: Open the Remote Desktop Connection app from the Start menu or by typing “mstsc” in the Run dialog (Win + R). Enter the computer name or IP address of the remote PC and click “Connect”.
- Universal App: Download and install the Microsoft Remote Desktop app from the Microsoft Store. Follow the prompts to add a PC and configure connection settings.
Using RDC on Mac
- Download the App: Go to the App Store and download the Microsoft Remote Desktop app.
- Set Up Connection: Open the app, click on "Add PC", and enter the necessary details (PC name, user account). Configure additional settings such as display and devices if needed.
Using RDC on iOS and Android
- Download the App: Install the Microsoft Remote Desktop app from the App Store (iOS) or Google Play Store (Android).
- Configure Connection: Open the app, tap on "+" to add a new connection. Enter the PC name, user account, and other required settings. Save the connection and tap on it to connect to the remote PC.
Ensuring Smooth Cross-Platform Usage
To ensure smooth cross-platform usage:
- Keep the Remote Desktop apps updated.
- Ensure network settings on the remote PC allow connections from the respective devices.
- Use a stable internet connection to avoid disruptions during remote sessions.
Using RDC on various devices expands your ability to manage remote PCs efficiently. However, you may encounter issues that need troubleshooting, which is covered in the next section.
Troubleshooting and Common Issues
Despite following the setup steps, you may encounter issues when using Remote Desktop. This section addresses common problems and provides troubleshooting tips to resolve them.
Common Issues and Solutions
- Remote Desktop Not Working:
- Check Remote Desktop Settings Ensure Remote Desktop is enabled on the remote PC. Verify firewall settings to allow RDP connections.
- Network Issues Ensure both devices are connected to the internet. Use the IP address of the remote PC if the computer name doesn’t work.
2. Permission Denied:
- Check User Permissions Ensure the user account has the necessary permissions for remote access. Add the user to the list of allowed remote users in the Remote Desktop settings.
3. Network Connectivity Issues:
- Same Network Connection Verify both devices are on the same network if connecting locally.
- External Connections Configure port forwarding on your router for external connections. Ensure the remote PC's firewall allows connections from external networks.
Advanced Troubleshooting Tips
-
Check Event Logs: Use the Event Viewer to check for any errors related to Remote Desktop connections. Navigate to
Event Viewer > Windows Logs > ApplicationorSystemand look for RDP-related errors. - Update Network Drivers: Ensure the network drivers on both the local and remote PCs are up-to-date. Outdated drivers can cause connectivity issues.
- Consult Microsoft Documentation: Refer to official Microsoft documentation and support forums for additional troubleshooting steps and solutions.
By following these troubleshooting tips, you can resolve common issues and ensure a smooth. remote access Experience. The following section concludes the guide and introduces the TSplus remote access solution as an alternative to RDP.
TSplus Remote Access Solution
For a more comprehensive and user-friendly remote access solution, consider TSplus. TSplus provides a robust alternative to Microsoft's RDP, offering enhanced security features, ease of use, and cross-platform compatibility. Whether you are managing a small business or an enterprise, TSplus can simplify your. Remote access needs and improve your overall productivity.
Leverage the power of remote access with confidence, knowing you have the right tools and security measures in place. For more information and to explore the full range of TSplus solutions, visit our website today.
Conclusion
Setting up Remote Desktop on Windows 10 and 11 is a straightforward process that significantly enhances your ability to manage and troubleshoot PCs remotely. By following the steps outlined in this guide, you can ensure a secure and efficient remote access setup, tailored to your specific needs. Implementing advanced security measures and utilising RDC across different devices further extends the functionality and usability of remote connections.
TSplus Remote Access Free Trial
Ultimate Citrix/RDS alternative for desktop/app access. Secure, cost-effective, on-premises/cloud
)
)
)